

To learn how to floss properly, guide the floss gently between teeth. Curve it into a C against one tooth, then move it up and down along that side and just under the gum edge. Repeat against the neighboring tooth before the next space. Do not snap the floss or force it into the gums. This cleans surfaces a toothbrush may not reach. If flossing stays difficult or uncomfortable, ask a dental professional to check your technique and tool.
Choose the Plano office or the Garland office and request a preventive-care appointment.
What does flossing add to your daily routine?
A toothbrush cleans the surfaces it can reach, while floss is designed to contact the sides of neighboring teeth where the bristles may not fit closely. Food and plaque can collect in these narrow spaces, including near the gum edge. Cleaning between teeth is one part of oral care, alongside brushing and regular dental visits. It is not a replacement for either of those steps.
The key is to clean both tooth sides in each space, rather than passing floss through the middle and pulling it straight out. Think of each gap as two small surfaces to clean: the side of the first tooth and the side of the next. A gentle C-shaped curve helps the floss follow those surfaces. The American Dental Association recommends flossing once a day to remove food and plaque from spaces a toothbrush may miss, and says the order of flossing and brushing matters less than doing both thoroughly. That guidance is on the ADA’s flossing page. A dental professional can still adjust the advice for your mouth and any dental work.
String floss works well for many people, but it is not the only possible aid. A floss holder, pick, interdental brush, or water flosser may be easier in some circumstances. The right choice depends on the spaces between your teeth, any orthodontic appliance or restoration, and what you can use consistently with good control. If you are unsure, bring the tool you currently use to an appointment and ask for a demonstration.
How to floss properly, step by step
1. Prepare a clean length and a comfortable grip
Wash and dry your hands first. For ordinary string floss, use a length long enough to keep a fresh section available as you move around the mouth. About 18 inches is a useful starting point for many people. Wind most of the strand around the middle fingers of both hands, leaving a short working section between them. Use your thumbs and index fingers to guide and steady that section.
Keep enough space between your fingers to control the floss without pulling it tight across the gum. As one section becomes soiled or frayed, wind it onto one finger and release a clean section from the other. That way you are not repeatedly using the same small piece in every gap. If managing a long strand is awkward, a holder or pick may be simpler to grip.
2. Ease the floss through the contact point
Place the floss between two teeth and use a small, controlled side-to-side motion to pass the tight contact point. Move slowly, especially where teeth touch closely. Do not push down sharply or let the floss snap onto the gum. Once it passes the contact, guide it toward the gum edge until you feel light contact. The goal is to reach the tooth surface near the edge, not to drive the floss deep into the tissue.
If the floss will not pass, do not force it. Try adjusting the angle and using a gentle rocking motion. If one particular space repeatedly blocks the floss, or floss catches or shreds there, stop tugging. A dental professional can look at the area and help determine whether the contact, a restoration, or your technique needs attention. A repeated snag is useful information to share, not a reason to pull harder.
3. Make a C shape around the first tooth
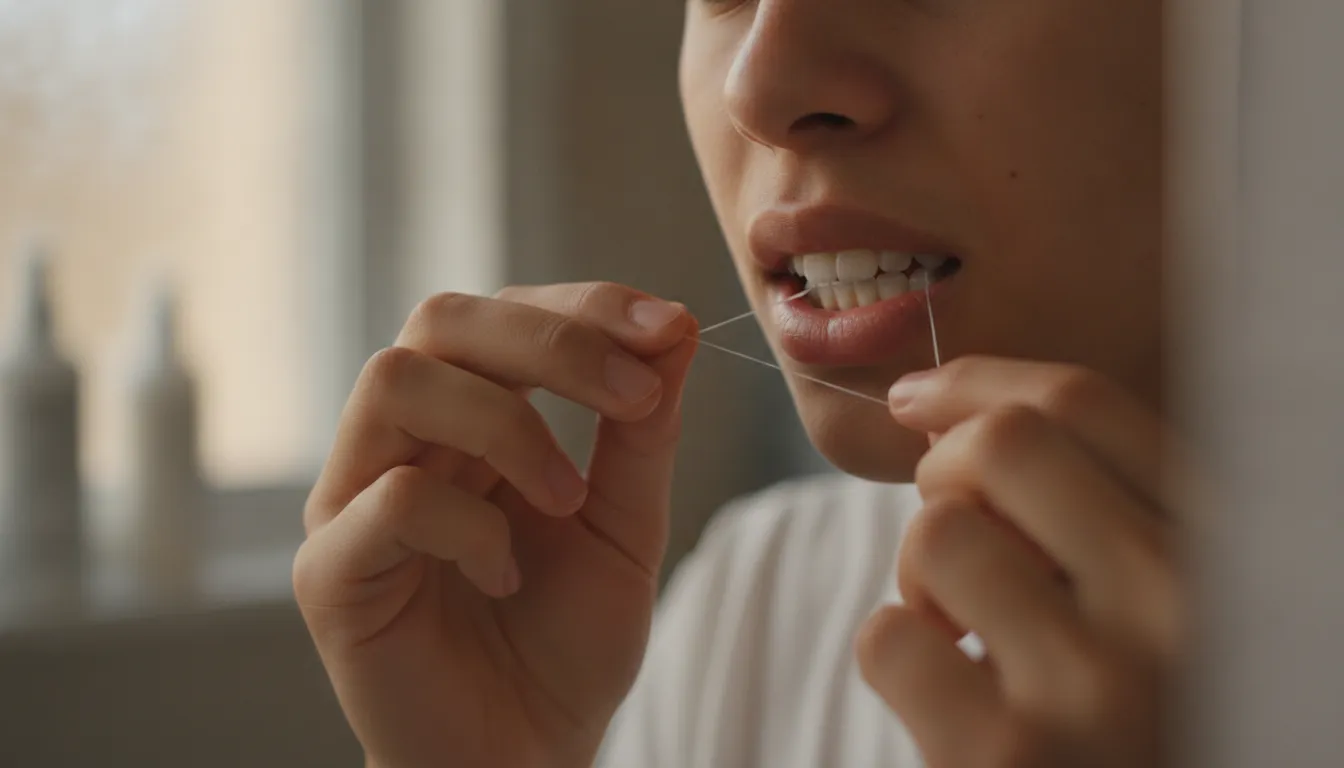
After the floss is between the teeth, curve it around one tooth so it hugs the side in a C shape. Hold it against that surface and move it gently up and down. The movement should sweep the tooth side from near the gum edge toward the point where the teeth meet, then back down. Keep the contact with the tooth as you move; do not saw forcefully across the gum.
Use a light, controlled motion. The floss should not be stretched tightly enough to cut or dig into the gum. A mirror can help when you are learning, but the goal is to develop a feel for the curve and movement so you can reach the back teeth without rushing. If you find yourself only pulling the floss straight up and down in the center of the gap, pause and reshape it against the tooth.
4. Clean the other side of the same space
One gap has two tooth sides. After cleaning the first side, curve the floss around the neighboring tooth and repeat the gentle up-and-down motion. It is easy to miss this second surface when you are moving quickly. A useful mental cue is “one space, two sides.” Ease the floss out with the same care you used to guide it in.
At the gum edge, let the floss slip just slightly beneath the edge while it remains curved against the tooth. You should not push as far as the floss can go or jab into the tissue. If a spot is tender, reduce pressure and make the motion smaller. Pain is not a reason to press harder in an effort to clean more deeply.
5. Follow a route so you do not skip spaces
Repeat the process between every pair of teeth, including the back surfaces of the last teeth. A set route makes this easier to remember. For example, begin at the back of the upper teeth, move across to the other side, then repeat along the lower teeth. You can choose the reverse direction; consistency matters more than which side comes first.
Use a clean section as you go. If you use a floss holder, reposition it so the floss touches both tooth sides in each space; a tool that is easy to hold still requires deliberate placement. After the final space, discard disposable floss in the trash rather than flushing it. Clean and store reusable devices according to their instructions. Take your time: a careful, repeatable routine is more useful than snapping quickly through the contacts.
What does a careful routine look like from start to finish?
Imagine starting at the upper back teeth with a strand of floss. You ease it through the first contact, curve it against the tooth nearest your cheek, and move it up and down gently. Then you turn the curve toward the neighboring tooth and clean that side before easing the strand out. You shift to a fresh section and move to the next space. This small sequence keeps each gap from becoming one quick pass that misses a tooth side.
When you reach the far side of the last tooth, clean that surface too if the floss can reach comfortably. Then continue across the upper teeth and repeat the same route on the lower teeth. If you lose track, pause and begin again at the last space you remember completing; rushing to catch up can lead to snapping or skipping surfaces. A consistent path makes it easier to notice a space that is hard to reach.
Now consider a spot where floss catches. Stop rather than pulling it through with force. Note which tooth or area is involved, try a small change in angle only if that feels comfortable, and move on to the rest of your routine. At your next dental visit, show or describe the issue and ask for a demonstration. This practical approach keeps your daily cleaning gentle while making repeated trouble easier to discuss.
How can you tell whether your technique needs adjusting?
Consider what happens in a particular area rather than assuming one difficult pass means you are doing everything wrong. If floss passes through but never touches the tooth side, practice making the C curve. If it snaps against the gum, shorten the working section and slow down as you cross the contact. If you cannot reach the back, change your grip or try a holder. If you repeatedly have trouble at one exact spot, ask a dental professional to check it rather than repeatedly testing it with force.
A small mirror can show whether the floss is positioned against the tooth, but it cannot tell you by itself whether the gum or a restoration is healthy. Notice patterns: a tool that shreds in one place, persistent soreness in one space, or difficulty passing a floss threader beneath an appliance. Write down which area gives you trouble and what you feel. Specific details make it easier for a clinician to demonstrate a safer approach.
If you have not flossed regularly, it may take practice to handle the strand and reach every space. Aim for gentle, careful cleaning rather than aggressive pressure. Bleeding can have different causes, including irritated tissue or forceful technique. Do not ignore ongoing, heavy, or worsening bleeding; contact a dental professional for advice instead of deciding on your own that more pressure or less cleaning is the answer.
What common flossing mistakes should you avoid?
- Snapping through a tight contact: A sudden pop can hit the gum. Guide the strand with small side-to-side movements and slow down as it passes between teeth.
- Cleaning only the center of the gap: Curve the floss against each tooth in turn. Passing straight down and pulling straight back up may miss the sides you intend to clean.
- Skipping the last teeth: The far side of the last tooth may be easy to forget. Include it in your route and use a holder if that gives you better reach.
- Using the same short section everywhere: Move to a fresh portion as you progress, especially when the floss becomes soiled or frayed.
- Digging into the gum: Floss should follow the tooth at the gum edge. Do not saw aggressively, jab, or force it far under the tissue.
- Quitting because of a single difficult space: Do not force a strand through a tight or obstructed area. Try a gentle angle change, then ask for help if the problem keeps happening.
- Assuming every bleeding episode is harmless: Review your pressure and technique, but seek advice for bleeding that persists, is heavy, or gets worse.
- Using a tool that does not fit: An interdental brush should not be forced into a tight contact. Ask which size and method are appropriate for the spaces you need to clean.
- Treating home care as an examination: Flossing cannot identify the cause of pain, a snag, or a change in the gums. Contact a dental professional when a symptom or repeated problem needs assessment.
Which flossing tool fits the space you need to clean?
The tool is less important than whether you can control it and reach both tooth sides. Use this as a starting point for a conversation, not as a rule for every mouth. If a tool will not enter gently, stop and ask which size or method fits that space.
| Tool | Often easier when | Still needs care |
|---|---|---|
| String floss. | You can grip a strand and guide it through ordinary contacts. | Use a fresh section and curve it against each tooth. |
| Floss holder or pick. | A long strand is hard to hold, or the back teeth are awkward to reach. | Position it on both sides of the space, not only through the middle. |
| Floss threader. | A wire, bridge, or fixed retainer blocks a straight path. | Do not tug on the appliance or force the threader into the gum. |
| Interdental brush. | A wider space lets the brush enter without force. | Do not push a brush that does not fit through a tight contact. |
| Water flosser. | Braces, a bridge, or limited hand control make string floss hard to manage. | Ask whether it should be used alone or with another cleaner. |
Bring the tool you already own to a preventive visit if you are unsure. The teeth cleaning visit is a practical time to ask which aid matches your contacts and any dental work.
How should you floss around braces and dental work?
Braces, bridges, implants, crowns, and retainers can change the route a cleaning tool must take. The right method depends on the shape of the appliance or restoration and the spaces around it. Move gently and avoid pulling hard against a wire or edge. A dental professional who knows your treatment can show you where to guide the floss and whether another aid is more appropriate.
Braces and orthodontic wires
With braces, a floss threader can guide floss beneath a wire and between teeth. Orthodontic floss or another recommended tool may also help. Thread carefully, then clean the sides of the neighboring teeth using the same C-shaped approach. Avoid tugging on brackets or the wire. If threading feels too difficult, ask your dental team to demonstrate it and discuss tools that may make the routine easier.
Convenience should not come at the cost of leaving surfaces untouched. A floss pick or water flosser may suit some people, but how well it fits your needs depends on your appliance and cleaning routine. Ask whether it should be used alone or alongside another method. If a wire feels loose or broken, do not try to repair it with a cleaning tool; contact the treating office for instructions.
Bridges
A fixed bridge connects replacement teeth to supporting teeth, so ordinary floss may not pass through every area as it would between two natural teeth. A threader or specialized bridge floss can help some people guide a strand beneath the replacement tooth and around supporting teeth. Follow the route demonstrated for your bridge. Avoid levering a threader against the restoration or pushing it into the gum.
If you cannot get the threader through, pause and ask for help instead of pulling forcefully. It can be useful to practice with a mirror at first, following the path shown by your dental professional. The design of a bridge varies, so a general description cannot replace instructions for your specific restoration.
Implants and crowns
Clean around crowns and implants gently, but do not assume that one type of floss or brush works for every restoration. The space around the work and the material or shape involved can affect which aid is suitable. Ask your dental professional to demonstrate how to reach the accessible surfaces without catching or pushing hard against an edge.
Tell the office if floss repeatedly catches or shreds beside a crown or implant, or if the surrounding gum becomes sore or swollen. Do not keep pulling against a rough or snagging area. A snag does not tell you what the cause is, but it is a clear reason to request guidance about the restoration and your cleaning method.
Removable and fixed retainers
If you wear a removable retainer, take it out before cleaning between teeth unless your clinician has instructed you otherwise. Floss the teeth, then clean and store the retainer as directed. A fixed retainer bonded behind the teeth can block a direct path for ordinary floss. A threader or suitable interdental aid may be needed to reach beneath the wire. Use a method demonstrated for that retainer, and report a loose or damaged wire rather than trying to fix it yourself.
If cleaning around dental work is the part that keeps stopping you, choose the Plano or Garland office and ask for a demonstration at your next preventive visit.
Which tool can help if string floss is hard to use?
Start with the reason string floss is difficult. Is it hard to grip, awkward to guide around the back teeth, blocked by orthodontic hardware, or catching repeatedly at one contact? The answer helps you ask a focused question and choose a tool for the problem. There is no advantage in struggling with an aid that you cannot control comfortably.
- Floss holder or pick: A handle can be easier to grip and may help reach some areas. Position the floss against both sides of each tooth rather than only passing the strand through the center.
- Interdental brush: This may suit some wider spaces, but the brush should fit without force. If it will not enter gently, do not push it through a tight contact.
- Water flosser: Some people find a water flosser easier to handle, including some people with orthodontic appliances. Ask whether it fits your needs and how to use it around your dental work.
- Threader or specialized floss: These may help route floss beneath a bridge or orthodontic wire. Ask for a demonstration so the tool does not catch on the appliance or press into the gums.
Do not use pins, sharp objects, or improvised tools between your teeth. They can injure gum tissue or damage dental work. If food remains stuck after a gentle attempt with an appropriate aid, do not dig at it; ask a dental professional what to do. Bring the tool you have tried and explain the difficulty, such as “I can reach the front but not the last molars” or “the strand shreds between these two teeth.” That makes the discussion practical.
When should you ask a dental professional for help?
Ask for guidance when flossing repeatedly causes pain, when bleeding persists or worsens, or when the same space is difficult every time. It is also sensible to ask if floss catches or shreds regularly, a restoration feels loose, or you are uncertain how to clean around braces, a bridge, an implant, a crown, or a fixed retainer. These observations do not diagnose a problem, but they give a dental professional a reason to check your technique or the area.
Significant swelling, pus, worsening pain, or a loose restoration deserves prompt professional advice. Do not press into the gum to inspect it or try to diagnose the cause from what appears on the floss. If a symptom is severe or rapidly worsening, seek timely professional guidance rather than relying on home cleaning alone. For routine questions, a preventive visit is an opportunity to ask about gum health, tight contacts, and a suitable tool.
Shifa Dental describes family and preventive care at its Plano and Garland offices. Patients can ask the office about appointment options for their preferred location and discuss the dental-care question they want addressed. The practice also has patient information about teeth cleaning in Plano and Garland and the role of regular dental checkups.
Choose the Plano office or the Garland office and request the preventive appointment that matches the office you prefer.
How can you make flossing a steady habit?
Choose a time you can repeat, such as before brushing at night, and keep your floss or preferred tool where it is easy to see. Pairing flossing with an existing routine, like getting ready for bed, can make it easier to remember. Choose a route through the mouth and use the same one each time. A simple sequence is to clean every space on the upper teeth, then every space on the lower teeth, taking care to include the backs of the last teeth.
If you are building the habit, focus first on controlled movement and reaching both sides of each gap. Avoid turning the routine into a race. If a tool is hard to handle, consider a holder or ask about another option rather than abandoning all cleaning between teeth. If your gums feel sore, reduce pressure and check your angle; persistent discomfort or bleeding calls for professional advice.
Home care and professional preventive care have different roles. Brushing and cleaning between teeth are daily habits; a dental visit allows a professional to assess concerns you cannot evaluate yourself and answer questions about your mouth. You can also read about questions related to bleeding gums and swollen gums in Plano, while remembering that online information cannot identify the cause of your own symptoms.
If string floss is frustrating, write down what gets in the way before your next visit. For example, note whether the issue is limited to the back teeth, one tight contact, or a dental appliance. A dental professional can watch your technique and help you make a practical adjustment. Small improvements in comfort and control can make a daily routine more manageable.
When you request preventive care, choose whether you prefer the Plano or Garland office and ask for an appointment that fits your concern. Bring up any repeated bleeding, soreness, or snagging, and ask the dental team to demonstrate a tool that works for your teeth and dental work.
Frequently asked questions
How often should I floss?
Many people include cleaning between their teeth once a day, but a dental professional can recommend a routine for your individual needs. The important points are to use a gentle method and clean both sides of each space rather than forcing floss through a tight contact.
Should I floss before or after brushing?
Choose an order that helps you remember to clean between your teeth and brush. If you are unsure how to organize your routine, ask your dental professional. Careful, consistent technique matters more than making the sequence complicated.
Is a floss pick as good as string floss?
A pick may be easier to hold and can help reach some areas. Whichever tool you choose, position it to clean both tooth sides in each space. If you are unsure whether you are reaching the surfaces, ask a dental professional to check your technique and tool choice.
Why do my gums bleed when I floss?
Bleeding may have different causes, including irritation from forceful technique or inflamed gums. Use a gentle C shape and avoid snapping or digging. If bleeding continues, is heavy, or gets worse, contact a dental professional instead of ignoring it or pressing harder.
Can I reuse floss?
Disposable string floss and disposable picks should be discarded after use. Use a fresh section of string as you move around your mouth, then throw it away. Clean and maintain reusable oral-care devices according to the manufacturer’s directions.
Can I get help choosing a flossing tool?
Yes. Tell a dental professional where you have trouble and whether you wear braces, have a bridge or implant, or use a retainer. To discuss preventive care, choose your preferred Plano or Garland office and call to request the matching appointment.